
Last Updated on October 7, 2022 by admin_hunter
Let’s face it. Fire is one of the most fundamental things to human beings that it’s difficult to imagine to picture something more transformative. That’s particularly true for lovers of the great outdoors where living becomes as basic as it gets which boils down to staying fueled, hydrated, and warm. Fire is typically a necessity for two of the three (staying fueled and warm).
If you believe the idea of immediate access to fire is exhilarating to outdoor enthusiasts, imagine how it was to the relatively ancient cultures. You can only picture how much a little butane meant to voyageurs.
The historical development of easy-to-use fire starters depicts how highly people regarded easy access to a fire. Granted, matches are the epitome of convenience and survival. However, they become useless with the slightest exposure to moisture.
While waterproof matches can be a great solution to this problem, they are only pricey. Furthermore, lighting them is an uphill battle. At times, matches fail to get the job done for unknown reasons.
Although starting a fire with an array of household items ranging from cotton balls and a cloth to a small lighter can be a breeze, when you’re in the wilderness, it’s a different ballgame. Here’s where a flint and steel fire starter comes into play. In this guide, we’ll explore this foolproof technique.
A Flint and Steel Fire Starter
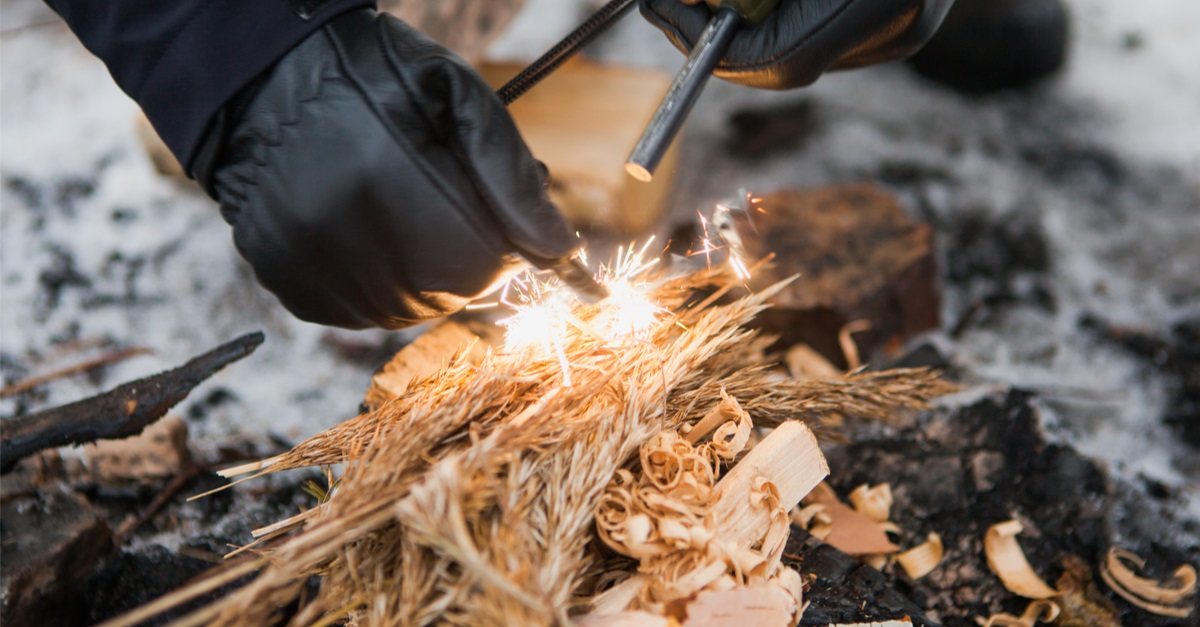
Here’s a step-by-step process of how to start a fire using steel and flint.
1. Create a Tinder Bundle
Also referred to as a bird’s nest, you can use an array of organic materials to light it. However, ensure that you use dry materials. You can use a combination of:
- Tree barks such as tulip, birch, cedar, poplar, and cottonwood
- Wood shavings
- Cotton balls
- Dread grasses and dried leaves
- Small twigs of up to ½ inch in diameter
Compile this nest in a small, circular tinder bundle that’s usable with your char cloth. Doing so captures the sparks and resultantly lights the first part of the flame. Additionally, you can set the nest down into an existing fire pit or ring.
2. Use a Char Cloth

To capture the initial sparks of steel against flint, a char cloth can be your holy grail. Once you cut up to 4 pieces of cotton cloth or linen, position them adjacently to the sharp edge of the flint. Ensure each piece is approximately 3 square inches with the edges fluffed out to capture the flying sparks. With a char cloth that’s properly heated by the sparks, position it within the tinder bundle or bird’s nest.
3. Strike Your Steel and Flint
Although you might assume that it entails striking the flint with excess elbow grease, it’s worth keeping in mind that the sparks produced are based on the speed of the steel. Furthermore given that it boils down to speed, it might be a no-brainer to run a short-stroke. However, that won’t cut it. Instead, a long stroke is ideal.
As a tip, practice a long stroke before you’re ready to strike. For the perfect long stroke, bend your arm at the elbow and speed up the steel through 1 foot of space (minimum) before it comes into contact with the flint. As you do so, ensure the flint is positioned at an upward angle and faces the steel.
As with everything else in life, practice makes perfect. Therefore, avidly using steel and flint to start a fire means it’ll get easier to strike a spark with utmost precision. When done right, you’ll hear the fizzing of the flying sparks which is evidence of a successful, strong, and firm stroke. At this point, the char cloth will smoke. That’s your cue to drop the flint and steel and immediately transfer the cloth to the tinder bundle.
4. Fuel the Fire
Drop the char cloth right in the middle of the next and enclose it to trap the embers and fledging sparks. Next, fuel the fire by gently blowing with a strong and long breath. As you do so, avoid rhythmical and short blasts of breath as that might put out the sparks which isn’t the goal. Now you can add pieces of wood and rocks strategically to protect the embers from the weed and feed the fire.
Why A Flint and Steel Fire Starter Is Reliable

Preparation to build a fire also entails making sure the steel and flint rod is ready. For instance, flint rods are affordable and an easily-available outdoor accessory. Nevertheless, these rods are built from iron oxide or magnesium rather than flint. If a flint rod doesn’t tickle your fancy, deposits of natural flint might be right up your alley. It boils down to where you’re attempting to set up a fire or camping. Useful rocks that you can consider are:
- Agate
- Jade
- Bloodstone
- Chalcedony
- Quartz
- Carnelian
The perfect flint for creating a fire should have an acute and sharp edge that eliminates the bite from the steel. While a multitude of people believes that the flint generates sparks, it’s the sharp edge that carves off a small piece of steel to ignite it. The great news is that you can utilize the sharp edge of your steel to ‘knap’ the flint.
Knapping refers to the skill of sharpening the edge of your flint rock to ensure it is appropriately sharp to take a bite out of the steel. Doing so entails using a camping knife. If you want to generate strong sparks from the initial strike, refrain from using flint with a blunt or rounded edge.
To Wrap Up
Creating a fire using a steel and flint kit is incredible and a lifesaving survival skill to have when exploring the great outdoors. The best part is that these materials save you the hassle of carrying a boatload of extra supplies that weigh you down. With the kit that includes iron pyrite, a char cloth, and C-shaped steel strikers, you’re good to go.